Introduction
How to Make Lip Balm? often this question arises to all of us as the winter arrives. Making DIY lip balm at home is a fun and easy way to tailor lip care products to your needs. You can use natural ingredients to make a lip balm that is moisturizing, nourishing and protective. And the cool thing is you can use it all season. In this article, we will show you how to make the perfect lip balm for soft and luscious lips.
What is Lip Balm?
Lip balm, also called lip salve or lip balm, is a topical skin care product designed to protect and moisturize the lips. It is usually applied to the lips to relieve dryness, chapping and discomfort. The primary purpose of a lip balm is to create a barrier on the lips, prevent moisture loss, and protect them from harsh environmental conditions such as cold or dry air, wind, and UV radiation. This protective layer helps keep lips soft, smooth and well hydrated.
Benefits of Lip Balm
Lip balm plays an important role in daily skincare for several reasons:
- Moisturization: The skin on the lips is thinner and more delicate than the skin on the rest of the face. It lacks oil glands, which makes it more prone to dryness and chapping. Lip balm provides the necessary moisture to keep lips soft and supple.
- Protection: Lips are exposed to various environmental stressors such as cold and dry air, wind and UV radiation. Lip balm creates a protective barrier, preventing moisture loss and protecting lips from these harsh conditions.
- Preventing chapping: Dry or chapped lips can be uncomfortable and even painful. Lip balm helps prevent chapping and can soothe already chapped lips, promoting a more comfortable feel.
- Improve Lip Health: Regular use of lip balm helps in maintaining the health of your lips. This reduces the risk of developing conditions like angular cheilitis, where the corners of the mouth become cracked and painful.
- Anti-aging: Lips can show signs of aging, such as fine lines and wrinkles. Lip balms with ingredients like antioxidants and SPF can help slow the aging process and keep your lips looking younger.
- Makeup application: Smooth and well-moisturized lips provide a good canvas for lipstick and lip gloss, helping your makeup look more polished and last longer.
- Overall Comfort: Dryness, cracking or peeling can be uncomfortable and distracting. A lip balm ensures that your lips feel comfortable throughout the day.
Significance of having DIY Lip Balm
- It is cheaper than buying lip balm from the store.
- You can choose the desired ingredients and avoid harmful chemicals.
- Your lip balm will be fresh and you can make small batches as needed.
- Reduce plastic waste.
Ingredients and Supplies needed for making DIY Lip Balm

To make DIY Lip Balm, you will need the following ingredients and supplies:
INGRIDIENTS –
- Beeswax: Beeswax is a natural emollient that helps thicken the lip balm. It also provides a protective barrier for the lips.
- Carrier Oil: You can choose from a variety of carrier oils such as coconut oil, sweet almond oil, jojoba oil or olive oil. These oils provide moisture and nourishment to the lips.
- Shea Butter: Shea butter is rich in vitamins and fatty acids, which help soften and hydrate lips.
- Essential Oils: Essential oils add fragrance and flavor to your lip balm. Some popular options include peppermint, lavender, or vanilla.
- Optional Ingredients: Depending on your preference, you can add natural colorants such as beetroot powder or mica, as well as vitamin E oil for extra nourishment.
SUPPLY –
- Double boiler or microwave-safe bowl: You’ll need a method to melt and combine your ingredients. A double boiler or microwave-safe bowl can be used for this.
- Lip Balm Containers: These can be small pots, tubes or tins that you use to store your finished lip balm.
- Measuring tools: Accuracy is important, so you’ll need measuring cups, spoons, or a kitchen scale to ensure accurate ingredient measurements.
- Stirring Pot: A stirring stick or spoon for mixing ingredients together.
- Pipettes or funnels: These can help transfer the melted lip balm mixture into the container more easily.
- Labels: Label your lip balm container with the date of manufacture and type of lip balm (eg flavor or fragrance) to keep track of your batch.
- Safety Equipment: Wear oven mitts or use pot holders when handling hot containers or ingredients.
Before you start making your lip balm, make sure your work area is clean and you have all the necessary materials and supplies. Follow a trusted lip balm recipe to ensure your homemade product turns out as intended.
Where to source these items?
Where to find ingredients and supplies for homemade lip balm:
- Beeswax: Local beekeepers, online retailers
- Carrier Oil: Health food stores, online retailers
- Shea Butter: Health food stores, online suppliers
- Essential Oils: Health food stores, online retailers
- Alternative foods: Natural food stores, online specialty stores
- Lip Balm Containers: Craft stores, online retailers
- Measuring tools, stirring bowls and pipettes: Kitchen supply stores, online retailers
- Labels: Office Supply Stores, Craft Stores
Note: While sourcing ingredients, ensure that they are of good quality and suitable for cosmetic use.
Always check the product description, read reviews and verify the reputation of the supplier before purchasing.
The Ultimate DIY Lip Balm Recipe
Here is a step-by-step guide on how to make DIY lip balm with exact measurements and instructions. This recipe yields approximately 20-25 lip balm tubes or 10-15 jars.
Materials:
- 2 tablespoons of wax tablets
- 2 tablespoons of shea butter
- 2 tablespoons of coconut oil
- 10-15 drops of essential oil of your choice (eg peppermint, lavender or vanilla)
Supply:
- Double boiler or microwave-safe bowl
- Lip balm containers (tubes, jars or tins)
- Measuring spoons or cups
- Stirring pot
- Pipettes (optional for filling containers)
- Labels for containers
Instruction –
- Create your workspace:
- Make sure your workspace is clean and organized.
- Set up all your supplies and containers.
- Clean your equipment:
- Wash and sterilize all equipment and containers to avoid contamination.
- Count the ingredients:
- Use a measuring spoon or cup to measure out the beeswax tablets, shea butter, and coconut oil. Measure each ingredient accurately for accurate results.
- Melt the Ingredients:
- Option 1: Using a Double Boiler
- Fill the bottom of a double boiler with water and place it on the stove over medium heat.
- Place the measured beeswax, shea butter and coconut oil in the top of a double boiler.
- Stir occasionally until all ingredients are completely melted and combined.
- Option 2: Using a Microwave
- Place the measured ingredients in a microwave-safe bowl.
- Microwave in 30-second intervals, stirring between each interval until everything is melted and well combined.
- Option 1: Using a Double Boiler
- Add Essential Oil:
- Once the mixture is completely melted, remove it from the heat source.
- Add 10-15 drops of your chosen essential oil and stir well to distribute the aroma evenly.
- Fill the Containers:
- Using a pipette or careful pouring, fill your lip balm container while the mixture is liquid. Be careful not to overfill.
- Let the Lip Balm Set:
- Let the container sit undisturbed for about 20-30 minutes, or until the lip balm hardens and cools completely.
- Label Containers:
- Label your lip balm containers with the date of manufacture and the type of lip balm (eg “Peppermint Lip Balm”).
- Cleaning:
- Clean your equipment and work area with warm, soapy water.
- Enjoy Your DIY Lip Balm:
- Your lip balm is now ready to use. Apply it on the lips for moisturizing and protection.
Store any leftover lip balm in a cool, dry place. Homemade DIY lip balm typically has a shelf life of 6-12 months. Enjoy the silky and nourishing benefits of your customized lip balm!
Safety Measures
Safety is the most important thing when making DIY lip balm. Here are some things to keep in mind:
- Keep your work area clean to avoid contamination and accidents.
- Ventilate your work area well if using essential oils.
- Use oven mitts or pot holders when handling hot ingredients to prevent burns.
- Supervise children closely as they help make the lip balm, especially when heating the ingredients.
- Label your lip balm container clearly with the ingredients used, especially if the lip balm contains potential allergens.
Customizing your DIY Lip Balm:
Customize lip balms with flavors, fragrances and natural colors:
- Flavors: Use food-grade extracts or oils, such as vanilla, peppermint, citrus or fruit.
- Fragrance: Add essential oils, such as lavender, eucalyptus, ylang-ylang or bergamot.
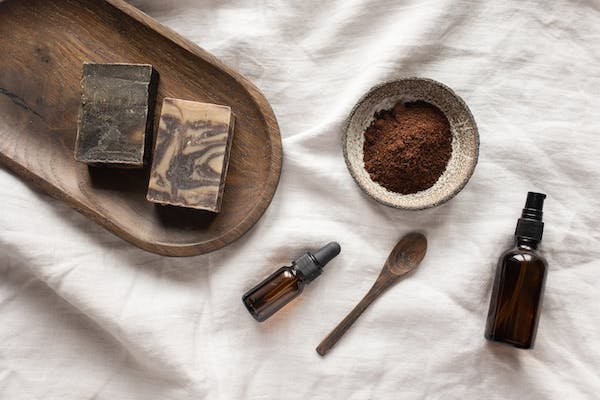
- Colorants: Use natural ingredients, such as beetroot powder for pink or red, cocoa powder for brown, turmeric powder for golden, spirulina powder for green, or mica powder for glowing shades.
Start with a small amount and adjust as needed. Test the colorant in a small batch before making a large batch.
FAQ’s
Which natural ingredients are the best for lip balm?
You can use ingredients like beeswax, shea butter, coconut oil and essential oils to create a natural and effective lip balm.
Can I add natural colors to my DIY lip balm?
You can use natural colors like beetroot powder, cocoa powder, or dried herbs to color your lip balm.
How long does lip balm last?
A Lip Balm generally can last for around 6-12 months, using natural preservatives you can even extend the life-span.
Are there any alternatives to beeswax lip balm recipe for a vegan?
Yes, candelilla wax, carnauba wax, or soy wax are good alternatives to beeswax for a vegan.
Conclusion
DIY lip balm is an affordable and creative way to care for your lips, ensuring they are moisturized, protected and uniquely formulated to your liking. By following the guide provided and customizing your lip balm with natural ingredients, you not only enjoy silky, well-nourished lips, but also the satisfaction of creating your own all-natural skincare product. So, give it a try and enjoy the benefits of your personalized lip balm.
